Contents
When being a God is just not enough
Classes
Each human character possess a class, which gives specified abilities and develops them when character gains a level. There is small chance that specified class can gain ability of other classes upon level, but it is rare and most of the time character will gain rare abilities through events and items.
There are 5 different classes and each focuses during level ups on different set of abilities:
 Warrior
- Strength
- Health
- Tactics
 Craftsman
- Folklore
- Speech
- Inteligence
- Health
- Craft
- Attractiveness
- Will
- Stealth
- Dexterity
 Medic
Medic
- Will
- Health
- Herbalism
- Gathering
- Medic
- Intelligence
 Hunter
- Stealth
- Animal Kinship
- Herbalism
- Strength
- Health
- Perception
- Dexterity
- Traps
 Gatherer
- Strength
- Health
- Gathering
- Craft
- Will
- Perception.
Abilities and Attributes
All characters in game are built via basic statistics and abilities redistribution system. Simple explanation is that they get X levels on start and abilities are randomly raised.
But to be precise, upon creation each character gets basic statistics and abilities pool based on character type (human, dwarf, ghost, dragoon…). Abilities are spent randomly through focus system based on character class or its custom abilities focus. Due to events and items, characters can get some special attributes that influence abilities or just give special bonuses and they are called attributes. Abilities are also required to unlock dialogue options in events or quests and sometimes even simply possessing such ability is not enough, but proper level is required.
List of abilities and attributes:
- Adrenaline Boost – only for challenge (physical and cure sickness). Double adrenaline boost damage to damaged characters.
- Animal Kinship – used in hunting challenges.
- Armour – character health during fights (combination of health and equipment bonuses).
- Attractiveness – used in social challenges.
- Backstab – only for challenge (sneak and hunt). Double Backstab damage to damaged characters.
- Clear Mind – only for challenge (social and tactical). When entering battlefield this card enters before the enemy.
- Concentration – only for challenge (intellect and hex). When entering battlefield this card enters before the enemy.
- Craft – improves crafting items and buildings.
- Curse – used in magic challenge.
- Damage – character damage during fights (combination of strength and equipment bonuses).
- Defense – increases armour of played card or targeted card when used as tactical card.
- Dexterity – increases stealth ability and also used in challenges (hunting and sneak).
- Distraction – only for challenge (sneak and hunt). Damages the enemy and heals you for distraction amount.
- Divination – only for challenge (intellect and hex). Double divination damage to already damaged characters.
- Fast Reaction – only for challenge (physical and cure sickness). When entering battlefield this card enters before the enemy.
- Feint – only for challenge (social and tactical). Double feint damage to damaged characters.
- Find Weakness – only for challenge (social and tactical). Damages the enemy and heals you for find weakness amount.
- Folklore – used in intellect and hex challenges.
- Gathering – improves gathering materials.
- Herbalism – used in sickness challenges.
- Intelligence – used in intelligence challenges.
- Light Steps – only for challenge (sneak and hunt). When entering battlefield this card enters before the enemy.
- Magic – used in hex challenges.
- Medic – used in sickness challenges and lowers chances of dying from wounds to whole group.
- Perception – used in hunting and intellect challenges.
- Ranged Damage – gives tactical abilities during fight challenges (support ally).
- Sixth Sense – only for challenge (intellect and hex). Damages the enemy and heals you for sixth sense amount.
- Speech – used in social challenges.
- Stealth – used in sneak challenges and gives tactical abilities during fight challenges (first action).
- Strength – determines how much character can carry. Used in fight (bonus damage) and physical challenges.
- Sturdiness – only for challenge (physical and cure sickness). Damages the enemy and heals you for sturdiness amount.
- Tactics – used in tactic challenges.
- Traps – used in hunting, tactical and fight (counter offensive) challenges.
- Will – used in social and hex challenges.
Temporary Positive Effects (Bless)
As a reward for positive resolving events or quests, participating group can become blessed, which temporary increases blessed abilities.
Bless of Attractiveness

Bless of Dexterity
Bless of Health

Bless of Intelligence

Bless of Magic

Bless of Speech

Bless of Strength

Bless of Will

Negative Effects
From simple wound, more complex poison or sickness to many negative magic effects such as curses is what character can get during exploration of Thea and beside wounds they are not easy to get rid off.
Wound
Wounds simply heal over time and it is most efficient if there is a character with medic ability in group and/or group is resting in settlement or created camp (fuel needed!).
Sickness

Sickness also cures over time, but requires medic ability and/or herbs to deal with.
Poison
Poison and curses can only be healed in special events or places such as herbalist hut (poison) or dziody camp (curses).
List of all negative effects:
- Wound – simple damage done due fight or events.
- Sick – common foe in Thea, won’t kill but will be bothersome.
- Heavily Sick – weakens and might kill if untreated.
- Deadly Sick – will kill for sure if untreated.
- Poisoned – wounds character every turn until and remains until healed.
- Heavily Poisoned – wounds character even more every turn and remains until healed.
- Deadly Poisoned – wounds character so fast that he might problems with surviving even under care and remains until healed.
- Cursed – creates a wound that can’t be healed by resting and stays until curse is removed.
- Curse of Darkness – lowers character will until curse is removed.
- Deforming Curse – lowers character attractiveness until curse is removed.
- Weakening Curse – lowers character strength until curse is removed.
Fights and Challenges
In Thea you can fight with any wandering monster by using muscles and steel, but sometimes you will have additional options to deal with adversary or be enforced to use them by events and those are called challenges. The difference between typical fighting challenge and ability challenge is that characters won’t be physically wounded by opponents as a result of damage from ability challenge. They may become wounded or die, because of the whole test if it was only way to protect villagers from disaster.
Each ability challenge is a test of abilities in specific situation created as a way of solving problem. For example you might want make a ritual and banish ghosts instead of fight with them face to face.
Types of challenges:
- Social – diplomacy test to solve things without fighting
- Sickness – handling and curing all diseases
- Hex – any kind of magic rituals or contact with dark magic
- Physical – all tests that require physical strength beside normal fight
- Intuition – dealing with problem the smart way
- Sneak – solving things quietly
- Hunting – tracking and preparing traps
Tactical Abilities
In any kind of fight player has tactical cards. Those cards have tactical abilities and as name suggests they are based on character abilities.
All cards are played on the board with rule that they are placed on the right of the last placed card and the same rule applies to tactical cards. Played tactical card will work if strength of the chosen tactical ability is equal or higher than target card level. In some situations player doesn’t know if card will have any effect (counter offense/tactic), because levels of cards in hand are hidden.
Beside “Get Closer” which is simply putting card into play but, there are others:
- Confuse – makes target lose first combat phase that round
- Counter Offense – removes card from opponent offensive card deck
- Counter Tactic – removes card from opponent tactical card deck
- First Action – moves target card to left on initiative line
- Protect Ally – target ally card gets bonus armour
- Support Ally – target ally card gets bonus damage
Weapon Abilities
Weapons besides damage have their weapon types and additional bonuses provided by materials such as special damage and ability boosts.
-
- Weapon Types
Hammers

Have blunt damage, which will trample damage to one additional target. So if an opponent card is killed and not all damage was used to finish it, then damage that was left will be dealt to another target.
Axes

Are straight forward and simply deal more damage compared to other weapon types.
Spears

Ability is executed while putting card into play and it moves played card before last card on the table.
Swords and Shields

Have the same special ability, which is bonus armour while playing this card on table or adds its value to protect ally tactical ability.
-
- Special Damage
- Appears mostly thanks to specific materials used in craft or sometimes are gained via level ups. Some monsters have them as natural weapon, for example bee’s use poison as primary source of damage.
Poison Damage
Counts as bonus damage and is doubled if attacked card is already wounded.
Leech Damage
Counts as bonus damage and heals owner by its value even if whole damage with leech value is more than attacked card has health.
Tactics
Different groups of monsters require different approach and while items provide plenty of abilities it is hard to show one best working. Nevertheless there are some well working tactics.
-
- Early game
-
- There are two approaches to survive fights in Thea and both base on weapon types. Sword and shield combination provides a lot of bonus armour for characters that don’t have much health, so it is easier to get through a fight without a scratch.
-
- Hammers are second option, which requires some knowledge about monsters and tactical abilities. Placing cards with blunt damage (hammers) before opponents allow to kill two opponents with a single attack and that requires using first action (tactical ability) or while being able to put two cards play firstly character with hammer and another tough one (with sword and shield) which will prevent from endangering hammer wielder from opponent cards with point damage (spear).
-
- Mid game
-
- At this stage of the game swords become less effective, but will still provide quite good survivability. While hammers are getting better at their job, opponents use more often tactical cards (confuse and first action) which may disturb proper placing hammer wielders on board.
-
- It is good to craft some mediocre armours at that point, especially made from Scalled Leather, which will increase strength. That bonus will allow to lift better and heavier equipment, also increases damage.
-
- Late game
-
- Swords and shields are becoming just an addition to armour and will be mostly used to improve other characters survivability via tactical ability (Protect Ally). It is still better option than spears and some axes, but stays behind good hammers.
-
- Hammers are great tool of destruction at this stage, but requires proper placing, which might be difficult. There is a way to deal with opponents tactical cards and need some preparations from player, which is equipment with stealth or dexterity (improves stealth). While having such items equipped calculate how many offensive characters you can move forward (don’t use cards that will be moved and those with first action), place rest of cards on the board and skip turns if necessary. Whenever opponent uses all his tactical cards, put your hammer wielders into play and move them forward with first action abilities.
Research
Whenever you get a research point, you can use it to unlock materials, crafting blueprints or construction blueprints. Spending those points wisely is crucial, because if you make a mistake or calculate game flow badly you may end with crafting unneeded items to get a research point or resending expedition for a material that will help you with getting that point, which in both situations is a waste of time (every 10 turns world difficulty raises by 1 to maximum of 10 after 100 turn – when dragons appear on the map).
-
- First Research Point
-
- So what can you do with the one point at the beginning?
-
- A good option is to unlock materials required to make first crafts and there aren’t many (crafting and gathering tools). If you have good starting materials you could think about unlocking crafting recipe, which will allow to equip your group with better gear. Usually spending that point on constructions is a bad choice, beside bonus from building which is always nice (especially chance of attracting more people to the village) building them with basic resources doesn’t give much or any research experience. If you are lucky you might find some building materials which for sure will help.
-
- Gathering Materials
-
- Spending point into unlocking material will add 10 pieces of it to your settlement, which will boost your research progress and improve equipment quite fast. Those gained resources should be used wise, because unlocked material appears somewhere on the map and it might be far away, so getting more of it and especially those rare ones (which additionally are not that easy to gather) might be difficult.
-
- Materials are divided in branches:
-
-
-
- Bones – used in many crafts
- Dried Plants – used mostly in gathering tools and ranged weapons
- Fibers – used mostly in gathering tools, light armours and a bit in ranged weapons and spears
- Wood – good material for constructions, shields and weapons
- Metals – outstanding material for weapons, heavy armours and shields
- Gems – appears in many recipes, but is only good in crafting jewelry
- Leathers – very good material in crafting light and medium armour, also good secondary material in other recipes
- Stone – primary use in constructions, but also very good in heavy weapons, especially top tier materials
-
-
-
- Crafting Recipes
-
- Beside food, which is addition to other recipes all other recipes in this category unlock equipment that can be worn.
Food
 At the beginning is just a material that can be gathered and consumed to not starve, but later in game when you have access to variety of different kinds of food and also those crafted ones, become a vital element in surviving in Thea. For each different type of food that group is consuming it gets bonuses, more of them and better ones when you have wide variety.
Equipment
 It is most important element of the game which will not only help you survive but finish the game and save world. Well-equipped expedition can withstand most of dangers in Thea. Focus mostly on recipes that you are able to craft and with time move as fast as possible to those that will enhance your survivability, like swords and shields defensive combination or aggressive hammer tactic. Those two tactics are most efficient in lowering damage done to your people and increasing chance that you will kill opponents first.
-
-
- List of grouped crafting recipes:
-
-
-
-
- Food – increases variety of craft able food
- Jewelry – gives small bonuses to attributes and sometimes special abilities
- Armours – survivability
- Swords and Shields – combination of good damage and protection
- Axes – very good damage items
- Ranged Weapons – gives or increases tactical ability (support ally)
- Hammers – weapons that can kill two opponents in one strike
- Spears – combination of mediocre damage and tactical advantage
-
-
-
- Constructing Buildings
- Constructing Buildings
-
- There are 9 buildings in Thea, where one (Pasture) is already unlocked. All of them boost settlements in many ways, some improve survivability of villagers in Ostoja and others help with attracting more people to your cause or simply buff villagers with some abilities.
-
- Buildings are rather supportive and improving chosen general tactic than from must have category. But nevertheless if you have spare research point it is worth considering to unlock and build them, especially if you have access to good materials (stone or wood). Some materials like in case of items, besides improving basic abilities may provide special bonuses.
Pasture
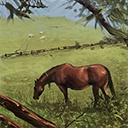
Will give extra food each turn and some chance to attract adults.
Cabbage Field

Gives a chance to attract kids and adults.
Herbalist Hut
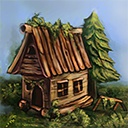
Gives or improves medic ability of all inhabitants.
Well
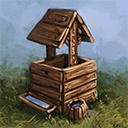
Each turn adds random resources.
Watchtower
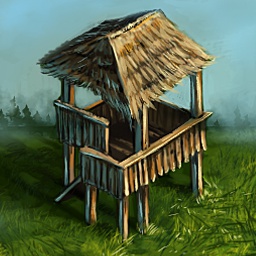
Increases vision around settlement.
Barracks
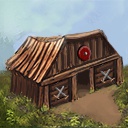
Improves damage of all inhabitants.
Palisade
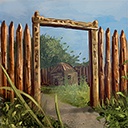
Improves armour of all inhabitants.
Smithy
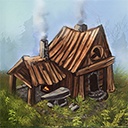
Gives or improves craft ability of all inhabitants.
Totem
Gives of improves magic ability of all inhabitants.